Sunday 8 November 2020

Learn how to enable Guest account on Windows 10

Guest account is mainly used to provide other people access to use your system to access the internet, run many apps by keeping some of your files, settings, and everything safe and secured. Now Microsoft does not allow you to create Guest account to share your PC. 

It offers you to create a restricted account to emulate such functionality. You can enable Guest account in Windows 10 by using any of the following solutions.

Various methods to create Guest account on Windows 10

There are several methods by which you can create Windows 10 Guest account:

Method 1 –Using Command Prompt

You need to follow the steps given below to create a Guest account on Windows 10. As "Guest" is a reserved account name in Windows, so in the following steps we have used "Visitor."

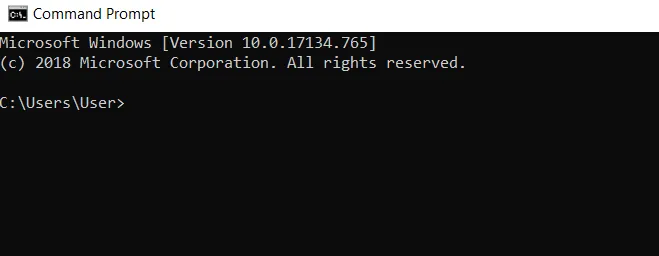
·         Right-click on the Windows icon from your desktop and select the Command Prompt (Admin) to run the Command Prompt as an administrator.

·         Select the Yes option when a window asking to continue appears on your screen.

·         Type the following command: net user Visitor /add /active:yes, and press the Enter key.

·         Press the Enter key twice when you will be asked to set a password (This will create a blank password for your account).

·         Type: net localgroup users Visitor /delete, and then press the Enter key (This will remove the Visitor user from the default users group).

·         At last, type net localgroup guests Visitor /add to add the Visitor user to the guests group.

Method 2 – Use Computer Management

Computer Management is a Windows application by which you can change various settings and view all important information related to your system. You can also enable or disable Guest account by using this tool. For this, apply the below-given steps:

·         Press Windows + X Key simultaneously, and choose the Computer Management option from the list.

·   Select System tools from the left navigation pane and then select Local Users and Groups option followed by Users.

·         Now, double-click on the Guest folder from the right pane.

·         Once the Guest Properties window opens, check if the default Account is disabled is selected. If it is, uncheck that option and click on the Apply button followed by OK to save changes.

Close the Computer Management window and check if the Windows 10 guest account is created.

Apart from the above methods, you can also create a new user account and change its account type to Guest account from the Settings app.

Thursday 8 October 2020

How To Fix Windows Was Unable To Format SD Card Issue

When you try to connect an SD card, a USB flash drive, or another memory card to the computer, you may receive a message "You need to format the disk in drive Z: before you can use it." Do you want to format it?" And when you proceed to format your card, you may find that your Windows was unable to complete the format SD card. If your Windows was unable to complete the format, you have to opt for some methods to resolve the issue at the earliest so that your system will not be harm further.

How To Fix Windows Was Unable To Format SD Card Issue

Possible Reasons for Windows Unable to Format SD Card

We must try to identify the possible reasons for why the Windows was unable to complete the format issue. Normally, the following factors lead to Windows was unable to complete the format:

  • Your SD card is Write Protected- If you format your SD card, then it generally performs writing operation. This write protection must be removed before formatting the SD card. To check if your Micro SD card is write-protected or not, you have to copy something to it. If you receive: "The disk is write protected. Remove the write-protection or use another disk" message on your computer screen, then your SD card is write protected, and you need to format it.
  • Your SD card is physically damaged- You can not format your Micro SD card if it is physically damaged. In such a case, you need to change and use another removable disk.

Quick fix for Windows unable to format SD card

While fixing the bad sectors on your SD card or cleaning its space, you need to format your SD card. But an error message indicating "Windows was unable to complete the format SD card" will appear on the screen. To troubleshoot this issue, use any of the following methods:

Method 1: Using Command Prompt

You can use Command Prompt if your Windows unable to format the SD card. Using the command prompt is the simplest way to format a hard drive. For this, follow the steps given below:

  • Type cmd in the search box of your desktop and then open Command Prompt.
Using Command Prompt
  • Now, type the following command: format C: /fs:ntfs and then press the enter button. (here "C" is the drive to be formatted, and "ntfs" is the file system).
Using Command Prompt

For example, the driver you need to format is drive "J" and the file system you want to have on the drive is "FAT32". Therefore, you need to enter the following command in the cmd window: format J: /fs:FAT32.

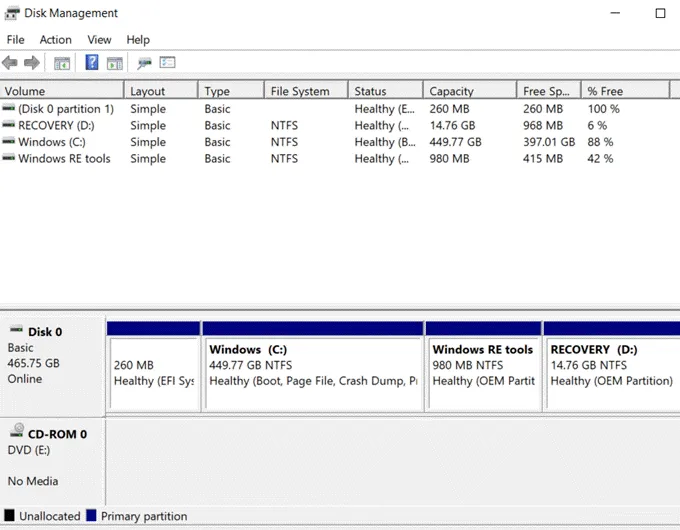
Method 2: Using Disk Management

The Windows unable to format SD card issue can be resolved by using Disk Management. This program will help you in managing the different drives on your computer.

  • Right-click on the Windows icon on the bottom left corner of the screen.
  • Now, click on the disk management option to open it.
Using Disk Management
  • Select the drive for which you received the "Windows was unable to complete the format" error message. Then right-click and choose the Format option.
Using Disk Management

If your Windows are still unable to format the Micro SD card, then you can use any third-party application to resolve the issue. You need to download and install the latest version of such applications to fix the issue.

Monday 21 September 2020

How to Fix Unidentified Network No Internet Access Errors in Windows 10?

There is no need to panic if you are getting an unidentified network no internet access error after installing the latest Windows 10 updates. Many factors such as corrupted, outdated, or incompatible Network adapter drivers, hardware issues, incorrect network configuration, and network account issues etc. cause this problem.

What are the causes of the Unidentified Network Problem on Windows 10?

Many factors are affecting the unidentified network no internet access windows 10. Given below are some of the major causes:

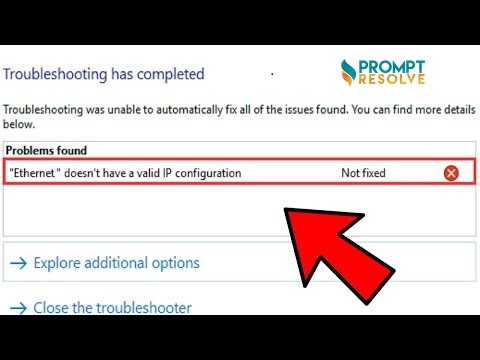
  • Wrong IP configuration: When you connect your system to the network, it is assigned an address known as IP address. If your IP address configuration is incorrect for any reason, it can cause the Unidentified Network issue.
Wrong IP configuration


  • Network settings: The settings of your network on you are also responsible for unidentified network errors.

  • Third-party software: Third-party applications such as antivirus, which you are using on your system, can also cause the No internet access issue.

How to Fix Network Errors in Windows 10?

As there are many different causes for this error to occur, there is no specific way to fix it. Given below are some of the methods to troubleshoot unidentified network no internet windows 10 issues:

  • Disable Security software: It is one of the very simple methods to resolve unidentified network issues. Temporarily turn off all the security software such as firewalls, antivirus software, etc. present in your system. As more and more third-party apps offer network protection, these apps may interfere with your settings and mess something up.
Disable Security software


  • Restart your modem and router: If you are using any wireless medium such as router or modem to access the internet, you must restart them to make sure that they are not causing issues with your network. These devices may also face some problems if left running for a long time without any restarts. Power cycling your router can help you to fix the unidentified network issue.
Restart Modem


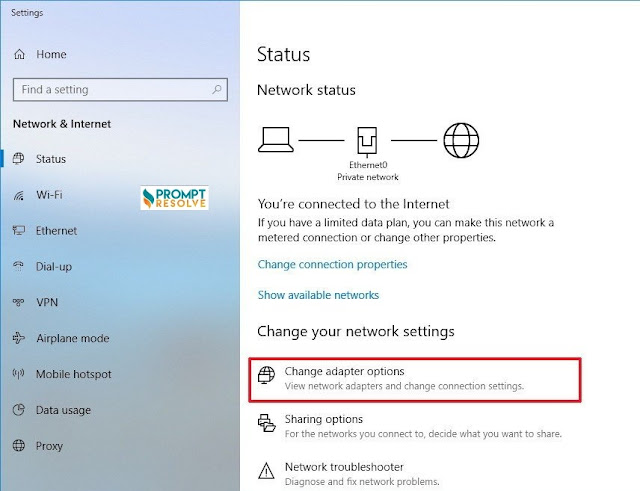
  • Turn off and then on Network Adapter: Press the Windows key + R and then type ncpa.cpl command followed by the enter key to restart the Network adapter. Disable the currently active network adapter by right-clicking on it. Please turn on the wireless adapter again after turning it off by right-clicking on the adapter and then select Enable. At last, reboot your PC and try to connect to your wireless network.
Turn off and then on Network Adapter


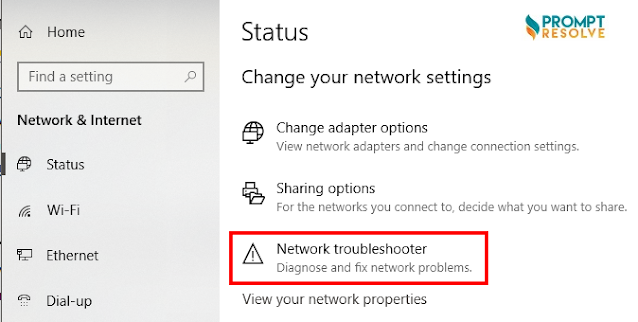
  • Use Network Troubleshooter: You can also use Windows 10 inbuilt troubleshooter to check and fix network and internet connection issues. By running the troubleshooter, your system’s window will automatically identify the issue and will try to fix it.
Turn off and then on Network Adapter


 These are some most effective solutions that will help you to fix unidentified network no internet access on Windows 10 computers. Simply follow the above mentioned techniques to fix No Internet Access error issue and make your PC normal.


Thursday 17 September 2020

Ways to Fix Issue of File Explorer Keeps Crashing in Windows 10.

The file explorer tool is one of the most used functions in the Windows OS, and hence file explorer keeps crashing is also one of the common issues faced by users. Before moving ahead to the solution for the case of Windows 10 file explorer keeps crashing, know what exactly is 'File Explorer'? It is the built-in file manager application on Windows and is originally called as Windows Explorer.


File Explorer Keeps Crashing in Windows 10

It is also one of the frequently used applications on the PC and hence file explorer keeps crashing. In case you're also facing the same issue, then stay calm as there are numerous ways to resolve the issue of file explorer keeps crashing windows 10.


Mentioned below are Two Ways to Fix the Issue of File Explorer Keeps Crashing

  1. Change Display Settings
  2. Clear File Explorer's History

Steps to Change Display Settings to Resolve Windows 10 Keeps Crashing Issue

At times, the file explorer keeps crashing in Windows 10 when the users change the text's size, apps, and other items on their PC. Below are the steps to change the display setting in order to get rid of file explorer crashing issue.

  • Tap on the Start button and enter Display
  • Now, visit 'Change display settings' on the list
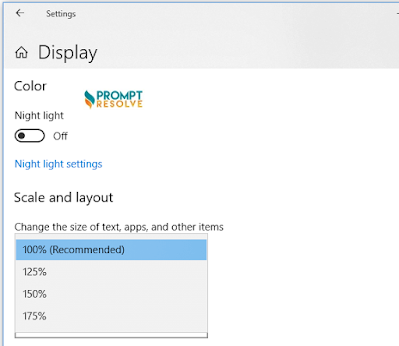
Change Display Settings


  • Navigate yourself to 'Scale & layout' section in the 'Settings' window
  • Now, select the size to be 100% or 200% if available as it is the recommended size

Steps to Clear File Explorer’s History to Resolve Windows 10 Keeps Crashing Issue

It is still unclear how the users have rectified the issue of file explorer keeps crashing by clearing their history. So, below are the steps for the same.

  • Tap on the 'Start' button and enter 'File Explorer'
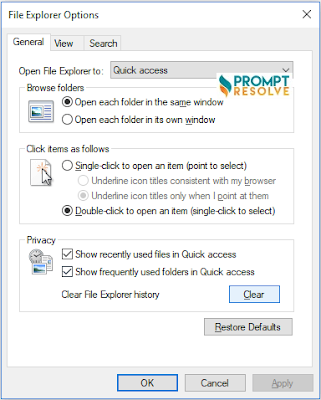
  • Click on the 'File Explorer Options' in the results
  • Click on 'Clear' in the 'Privacy' section and the whole process will be completed in a few seconds
Clear File Explorer's History


Know Common Causes of File Explorer Crashing in Windows 10

We all know every error comes with a cause, and there are numerous factors which make the issue of file explorer keeps crashing crop out often. Some of the grounds for the same are:

  • Permission issues
  • Incompatible 3rd party software
  • Improper system settings
  • Other hidden reasons

Know Common Symptoms of File Explorer Crashing in Windows 10

Below are some of the common causes of Windows 10 file explorer keeps crashing:

  • Windows 10 file explorer is not responding
  • Windows 10 file explorer stopped working
  • File explorer won't open in Windows 10
  • File explorer keeps closing
  • File explorer closes while right-clicking a file
  • File explorer hangs frequently

This complete guide on the windows10 file explorer keeps crashing will offer an insight to the individuals facing this issue repeatedly.   


Wednesday 16 September 2020

Easy Guide on How to Fix System Service Exception Windows 10

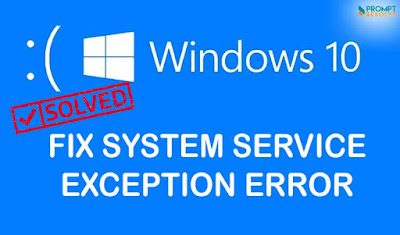
If you're here, then you must be thinking what exactly system service exception error Windows 10 is. This error occurs because of multiple reasons which the users ignore. BSOD errors (Blue Screen of Death) errors still occurring are relatively uncommon. 

system service exception windows 10
Add caption


Earlier, when the system uses to crash, the blue wall with text used to appear. However, Windows BSOD is relatively easy to troubleshoot, and one of the repeated BSOD errors is the Windows 10 BSOD system service exception. If you're facing the same issue, you will get to know how to resolve this article.

Know what is the System Service Exception Error Windows 10?

It is basically one of the errors caused mainly by a bug in Window or outdated drivers, corrupted system files, or possibly because of a rogue app that tries to access and run protected Windows code. Windows 10 system_service_exception error pops up majorly because of the below-mentioned reasons.

  • Graphic user interface errors
  • Issues with outdated or corrupt drivers amongst others
  • Corrupted system files

Drivers are one of the primary causes for Windows 10 stop code system service exception; wrong or outdated drivers can lead to such errors and disturb the user experience. Apart from this, other reasons also contribute to the windows 10 BSOD system service exception.

How to Fix a System Service Exception Error Windows 10?

Following the below-mentioned ways, one can quickly fix Windows 10 system_service_exception

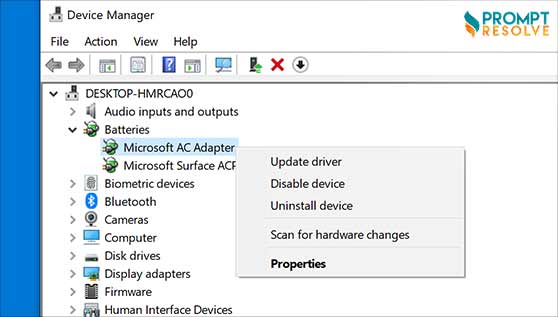
  • By Updating System Drivers

By Updating System Drivers
Add caption


  • By Updating Windows 10
  • By Running Windows Check Disk from Command Prompt
  • By Running System File Check
  • By Installing the Official Windows Hotfix
  • By Resetting Windows 10

·

The above-mentioned ways offer the best solution to eradicate Windows 10 system service exception. However, the users have to follow all the steps in order to get rid of this error.

What Users Should Do If System Service Exception Windows 10 Keeps Restarting?

In case you are facing the issue of system service exception windows 10 restarting again and again, follow the steps mentioned below:

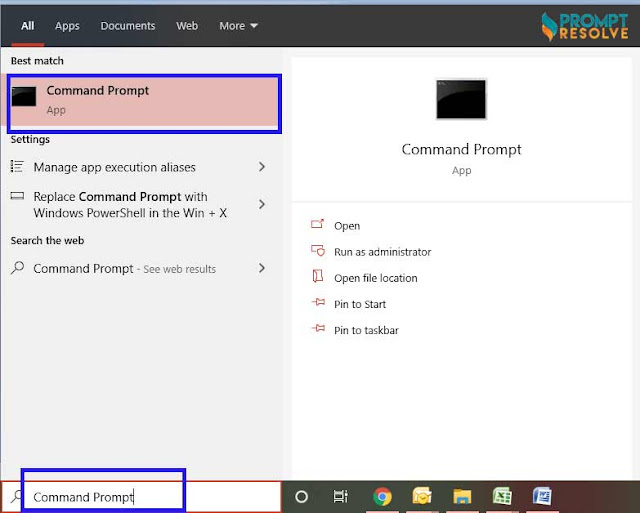
  • Type Command Prompt in Windows search bar and right click on the same and tap on 'Run as Admin'
Type Command Prompt in Windows
Add caption


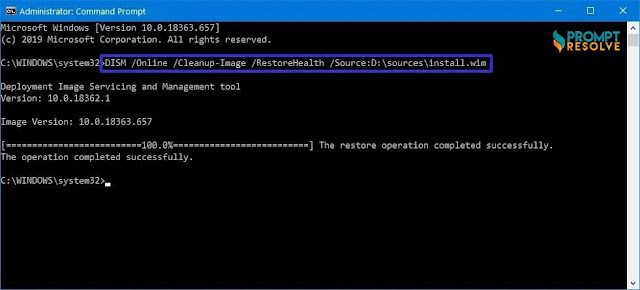
  • Then you've to enter the "DISM /online /cleanup-image /restorehealth" command and hit the enter button
enter the "DISM


  • Now, wait until the process is getting completed. However, this may take a while. When the process is completed, type SFC/Scannow & finally press enter. 

The ways mentioned above will definitely help the users get rid or system service exception error Windows 10 completely.

Monday 14 September 2020

How to Disable Adobe Genuine Software Integrity Service on Windows?

 Many times when the users use Adobe software, they receive messages like 'the Adobe software you are using is not genuine.' Here in this post, you will get to know the solutions or how to disable adobe genuine software integrity service in Windows.

Adobe Genuine Software Integrity Service

Adobe Genuine Software Integrity Service

Adobe Suite is a well known complete package when it comes to editing photos or videos. However, recently, many people have reported that when they use Adobe Suit, they  receive the error message, which says 'the Adobe software you are using is not genuine.' 

No matter which device the user is using, there are high chances that you will also receive this message.Below are the ways to remove adobe genuine software integrity service on windows.

Ways  to Disable Adobe Genuine Software Integrity Service on Windows

Solution 1  - Disable Adobe Genuine Software Integrity in Services

Yes, you got that correct you can disable adobe genuine software in service, and below are the steps for the same:

·         In the search box, type services and click on the standard category
·         Find Adobe Genuine Software Integrity Service and right-click on the same to go for properties


 Now under the General tab, change the Startup Type to Disabled 


  • Click on the Apply button 


Solution 2 - Disable Adobe Genuine Software Integrity in Task Manager


It is another smooth and easy-going process which will indeed disable adobe genuine software integrity service. The quick steps are relatively easy and offer instant help to the users.

  • In the search box, type Task Manager to open it
  • Search for Adobe Genuine Software Integrity Service and right-click on the same

Search for Adobe Genuine Software Integrity Service


  • Open the file location
  • Open the AdobeGCIClient file and return back to the Task Manager window one more time
Open the AdobeGCIClient file


  • Right click on the same and click on the End Task button. With these steps, you can delete the Adobe folder entirely, and hence you've also disabled adobe genuine software integrity.
  •  

By following the above-mentioned steps, users can successfully disable adobe genuine software integrity service. So, in case you were looking for the solution for how to disable adobe genuine software integrity service on window, then above mentioned solutions will help you get rid of the error message again and again popping on your screen. 

The ways discussed above include quick steps that are smooth to disable adobe genuine software integrity service on windows 10.  

Thursday 10 September 2020

Top 5 Easy Solutions to fix Acrobat failed to Connect to a DDE server?

The Dynamic Data Exchange or DDE Servers is basically a third-party product, used specifically for sending and receiving data on Windows. It lets user to execute commands like open, save, close, edit, and write.

Solutions to fix Acrobat failed to Connect to a DDE server


But, there are a lot of instances when one come across the situation where Acrobat failed to connect to a DDE server 2020. If you have also faced similar situation, we would recommend you to fix the issues by following the steps given below:

Quick Fixes For Acrobat Failed To Connect To A DDE Server Windows 10:

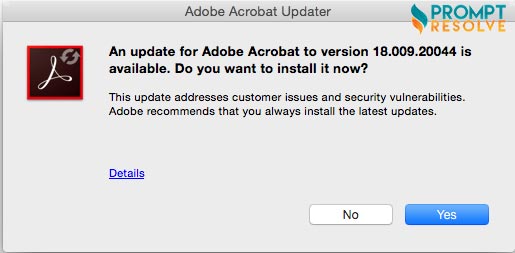
Solution 1- Make sure you have updated the Acrobat Reader:

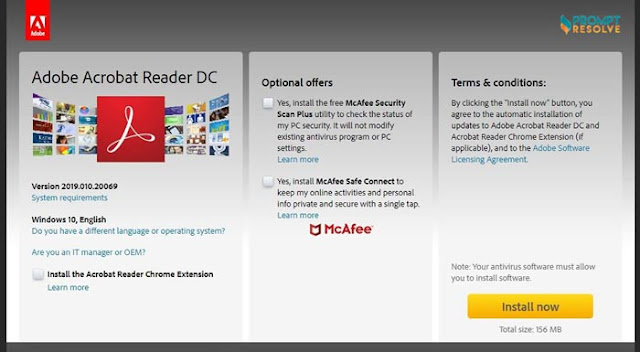
  • The first and the foremost thing that you are supposed to do are to ensure that you have updated the Acrobat Reader to the latest version.

Updated the Acrobat Reader


  • If not, you will face the issue of Acrobat failed to connect to a DDE Server Windows 10.

  • So, check for the updates and start to update accordingly.

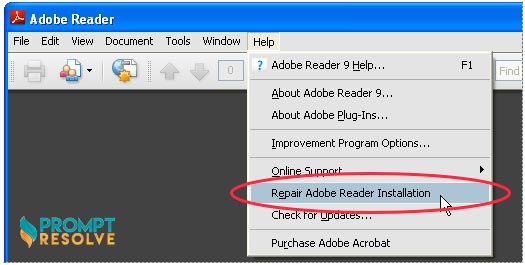
Solution 2- Repairing of Adobe Acrobat: 

  • In case, if the Acrobat files are programs are corrupted, you need to repair it as soon as possible. 
  • There are a lot of online tools available for repair that you can easily choose and pick. 
Repairing of Adobe Acrobat


  • Once you have repaired Adobe Acrobat, there is a possibility that Acrobat would automatically start connecting to a DDE Server. 


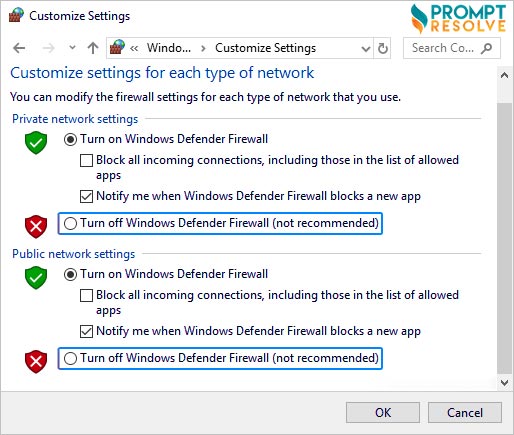
Solution 3- Disable Antivirus and Firewalls: 

  • There are a lot of instances when third-party applications create problems. This might happen with Adobe Acrobat as well. 

Disable Antivirus and Firewalls


  • So, if you notice that Acrobat failed to connect to a dde server 2020, you should try to connect after disabling the third party programs, be it the antivirus software or firewalls. 


Solution 4- Restart Adobe Acrobat: 

  • If you are stuck with issues while connecting Acrobat to DDE Server, we would recommend you to retry building connection after restarting Adobe Acrobat Reader. 
Restart Adobe Acrobat


  • Mostly, basic issues related to connection failure get resolved by restarting the device. So, make sure, you also try to restart the device before you try to connect Acrobat.


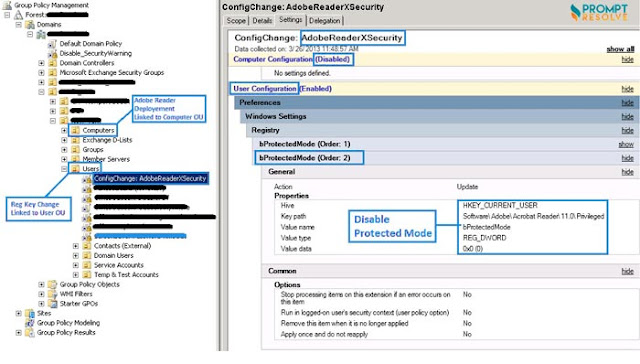
Solution 5- Disable the protected mode on startup: 

  • The protected mode ensures extra security at the time of starting up. 
  • However, at times, this mode becomes responsible for disallowing building connection between Adobe Acrobat and DDE server on Windows 10 in 2020. 

Disable the protected mode on startup


  • So, it is a good idea to disable the protected mode on startup. 

That’s all! Try the above-given hacks to resolve the issues of Acrobat failed to connect to a DDE server.